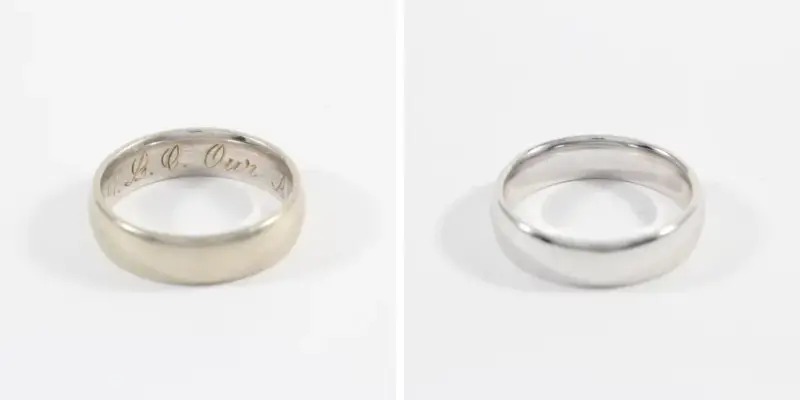
Removing engravings from metal posts can be a challenging task, especially if the engraving is deep or has been done using a high-powered laser. However, with the right tools and techniques, it can be done successfully. In this article, we will discuss how to remove engravings from metal posts with both chemical and physical methods.
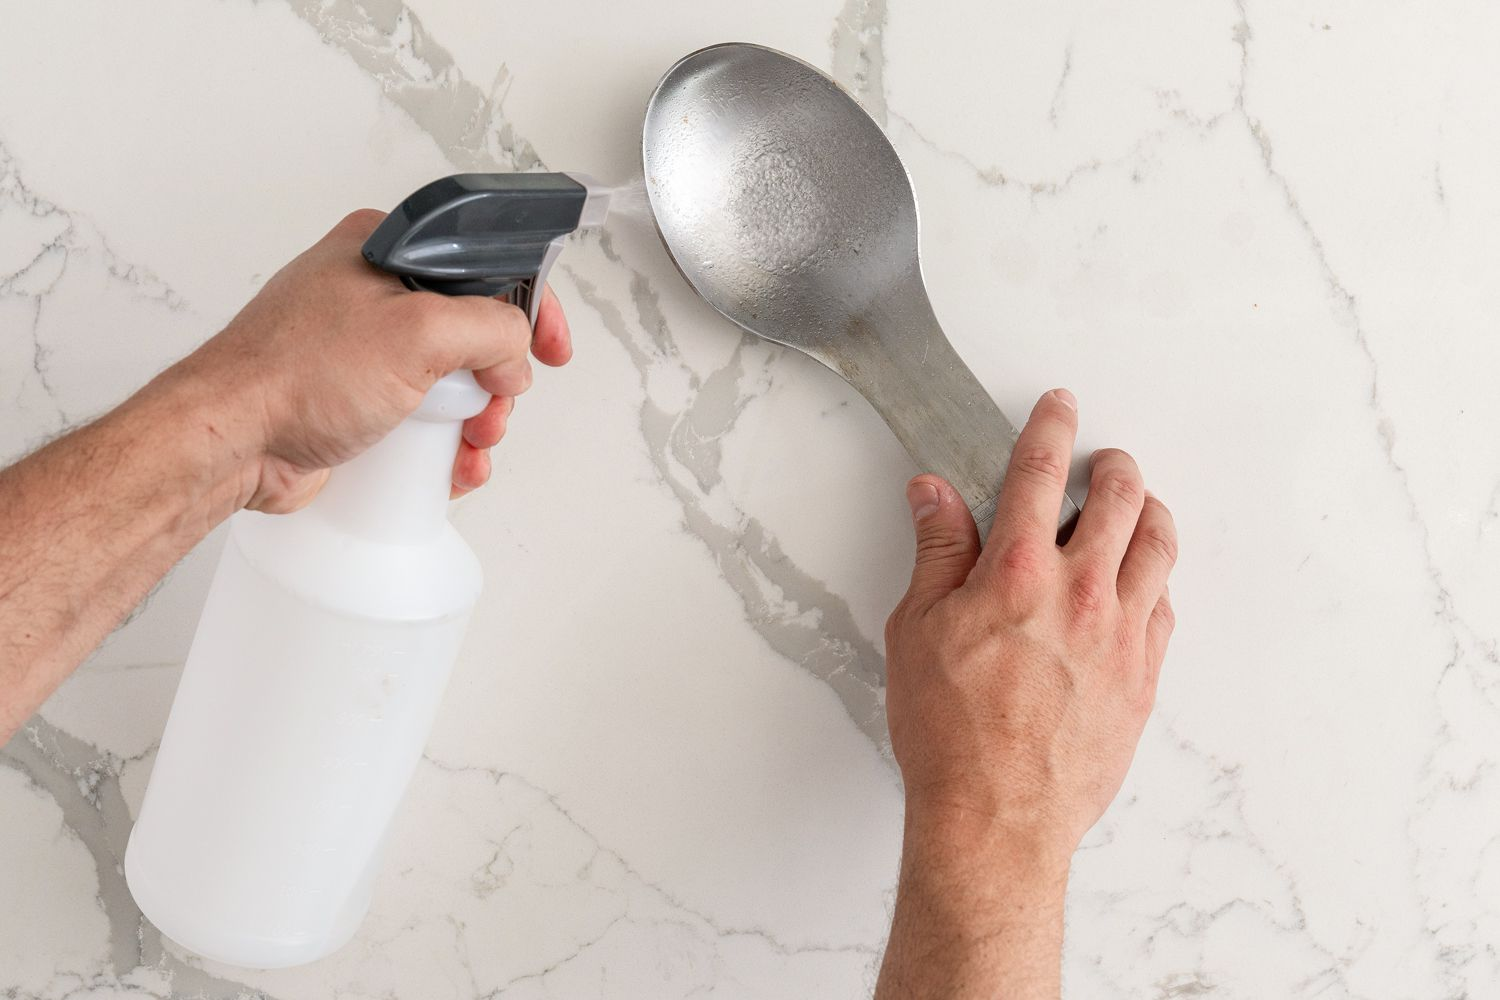
One way to remove engravings from metal posts is by using chemical etching solutions. These solutions dissolve the metal surface and remove the engraving along with it. Common chemical etching solutions include hydrochloric acid, acetic acid, and sodium hydroxide. The solution should be applied to the engraving, and then allowed to sit for a specified amount of time before being neutralized and rinsed off. It is important to take safety precautions when working with chemical etching solutions, such as wearing gloves and protective eyewear.
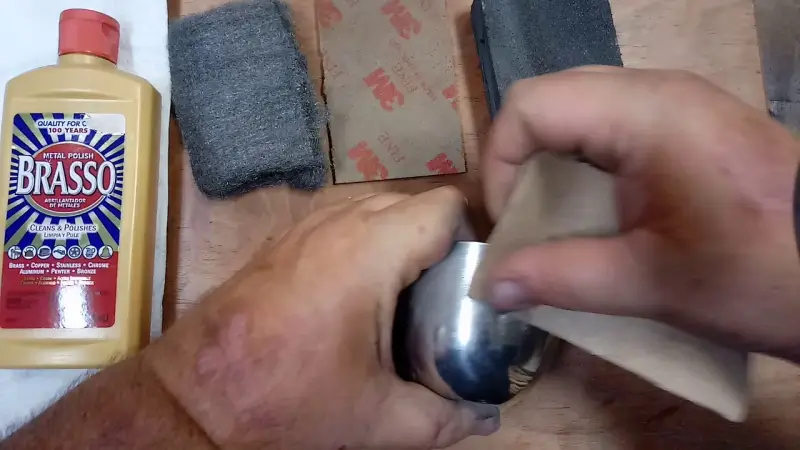
Another way to remove engravings from metal posts is by using mechanical methods, such as sandblasting or sanding. Sandblasting involves using a high-pressure stream of sand to remove the surface of the metal and the engraving. Sanding, on the other hand, involves using a sanding tool, such as a belt sander or a rotary tool, to manually remove the engraving. This method is typically more time-consuming but can also be more precise and allow for better control over the amount of material removed. Whichever method is used, it is important to work slowly and carefully to avoid damaging the metal post or causing any further deformities.
How To Remove Engraving From Metal Ovtrview
The first method is chemical etching. This involves using a chemical solution to dissolve the metal surface and remove the engraving along with it. Some common solutions include hydrochloric acid, acetic acid, and sodium hydroxide. To use this method, simply apply the solution to the engraving, let it sit for the specified amount of time, neutralize it, and then rinse it off. One thing to keep in mind is that you’ll want to take safety precautions when working with chemical etching solutions, such as wearing gloves and protective eyewear.
Another option is to use mechanical methods, such as sandblasting or sanding. Sandblasting involves using a high-pressure stream of sand to remove the surface of the metal and the engraving. This method is a bit more involved, as you’ll need to have access to sandblasting equipment, but it can be very effective and efficient. Sanding, on the other hand, involves using a sanding tool, such as a belt sander or a rotary tool, to manually remove the engraving. This method is a bit more time-consuming, but it’s also very precise and allows for better control over the amount of material removed.
No matter which method you choose, it’s important to work slowly and carefully to avoid damaging the metal or causing any further deformities. And with the right tools and techniques, you’ll be able to remove engravings from metal like a pro! So go ahead and give it a try – you won’t regret it!
How To Remove Engraving From Metal – Methods in Comparison
| Method | Ingredients | Pros | Cons |
|---|---|---|---|
| Sanding | Sandpaper or sanding block | Effective for deep engraving | Requires physical effort; may scratch the metal |
| Buffing | Buffing wheel, polishing compound | Effective for shallow engraving | Can be tricky to get a consistent finish |
| Chemical removal | Chemical remover, protective gloves, goggles, mask | Can dissolve the engraving quickly | Requires caution and protective gear; may damage the metal |
Sanding involves using sandpaper or a sanding block to gradually sand away the engraved area. This method is best for larger or deeper engravings, as it requires a bit of elbow grease. Sanding can be a bit messy, so be sure to work in a well-ventilated area and wear protective goggles and a mask. Sanding is effective for deep engraving, but it may scratch the metal and requires physical effort.
Buffing involves using a buffing wheel or polishing compound to remove the engraving. Buffing is best for smaller or shallow engravings and can give a great shine to the metal. However, it can also be a bit tricky to get a consistent finish. Be sure to start with a lower speed on the buffing wheel and gradually increase it as you go. Buffing can be effective for shallow engraving, but it may be challenging to achieve a uniform finish.
Chemical removal involves using a specialized chemical remover to dissolve the engraving. Be sure to choose a remover that is safe for the type of metal you are working with and follow the instructions carefully. Chemical removal can be effective and can dissolve the engraving quickly. However, it requires caution and protective gear such as gloves, goggles, and mask. It may also damage the metal if not used properly.
In summary, each method has its own advantages and challenges. Sanding is effective for deep engraving but requires physical effort. Buffing is effective for shallow engraving but can be tricky to achieve a uniform finish. Chemical removal is fast but requires caution and protective gear and may damage the metal if not used properly. It’s important to choose the right method for your specific situation, and always take safety precautions to avoid any damage or harm.
Equipment for Removing Engraving From Metal
| Equipment | Description |
|---|---|
| Chemical etching solution | Hydrochloric acid, acetic acid, or sodium hydroxide |
| Protective gloves | To protect your hands when working with chemical solutions |
| Protective eyewear | To protect your eyes from splashes or fumes |
| Sandblasting equipment | High-pressure sandblaster and sand |
| Sanding tool | Belt sander, rotary tool, or sandpaper |
| Safety equipment | Dust mask, safety glasses, or respirator |
Step By Step Instruction On How To Remove Engraving From Metal
Step 1: Choose a method Select the method you want to use for removing the engraving, whether it be chemical etching or sandblasting.
Step 2: Prepare the metal Clean the metal surface to remove any dirt, grease, or oil. This will help the solution or sand adhere better to the metal surface.
Step 3: Prepare the safety equipment Put on protective gloves and protective eyewear to protect your hands and eyes from splashes or fumes.
Step 4: Chemical Etching If you are using chemical etching:
- Apply the chemical etching solution to the engraving.
- Wait for the solution to dissolve the metal surface, which may take several minutes to several hours, depending on the depth of the engraving and the solution you are using.
- Rinse the metal thoroughly with water to neutralize the solution and remove any residue.
Step 5: Sandblasting If you are using sandblasting:
- Fill the sandblaster with sand.
- Adjust the pressure and angle of the sandblaster to best suit the depth of the engraving.
- Start sandblasting the engraving, moving the sandblaster slowly and carefully to avoid further deformities or damage to the metal.
- Repeat the sandblasting process until the engraving is removed to your satisfaction.
Step 6: Clean up Remove any remaining sand or residue from the metal surface. Clean and store the equipment according to the manufacturer’s instructions.
Step 7: Finish Polish the metal surface if desired to restore its shine and smoothness.
Note that this is a general instruction, and the specific steps and details may vary depending on the method you choose and the metal you are working with. Be sure to carefully read the instructions and warnings associated with each method and each piece of equipment before you begin to work, and take all necessary safety precautions to protect yourself and others.
F.A.Q.
What is the easiest way to remove engraving from metal?
The easiest way to remove engraving from metal depends on the depth of the engraving. For shallow engravings, chemical etching may be the easiest option, as it only requires applying the solution and waiting for it to dissolve the metal surface. For deeper engravings, sandblasting may be the easiest option, as it is efficient and can be completed quickly.
Is chemical etching safe for removing engraving from metal?
Chemical etching is safe when used properly, but it is important to take necessary safety precautions, such as wearing gloves and protective eyewear, when working with chemical solutions. Additionally, it’s important to follow the instructions carefully and neutralize and rinse the solution off after use to avoid any potential damage to the metal.
How do I choose between chemical etching and sandblasting?
The choice between chemical etching and sandblasting depends on the depth of the engraving and the equipment you have access to. Chemical etching is typically more affordable and easier to use for shallow engravings, while sandblasting is more efficient and effective for deep engravings. Consider the pros and cons of each method and choose the one that best fits your needs and preferences.
Can sandblasting damage the metal?
Sandblasting can damage the metal if not used correctly. To avoid damage, be sure to use the right sandblasting equipment and sand, and adjust the pressure and angle of the sandblaster as necessary. Additionally, be sure to work slowly and carefully to avoid any further deformities or damage to the metal.
What safety equipment do I need when removing engraving from metal?
The specific safety equipment you need will depend on the method you choose to remove the engraving. Common safety equipment includes protective gloves, protective eyewear, dust masks, safety glasses, or respirators. Be sure to carefully read the instructions and warnings associated with each method and each piece of equipment before you begin to work.
Leave a Reply