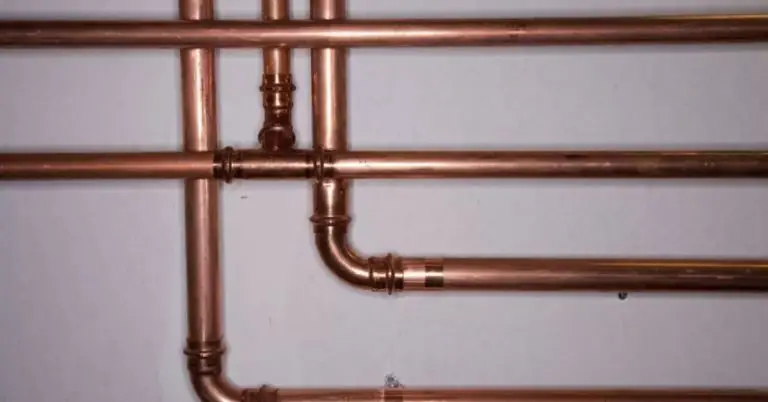
Copper pipes are a staple of modern plumbing, offering durability and corrosion resistance that make them an ideal choice for both residential and commercial applications. Despite their longevity, however, copper pipes can still start to look a little dull and worn over time, especially in areas where water and other elements have taken a toll. For homeowners looking to restore the appearance of their copper pipes, painting can be an effective and affordable solution.
In this blog post, we will explore the various options for painting copper pipes, including the best types of paint to use, the steps involved in the process, and the tips and tricks to ensure a long-lasting and professional-looking finish. Whether you’re looking to update the look of your kitchen or bathroom plumbing, or simply want to add a pop of color to your DIY projects, we’ve got you covered. So, are you ready to give your copper pipes a fresh coat of paint? Let’s get started!
Painting Copper Pipes Overview
The first thing you’ll need to do before you start painting is to properly prepare the surface of the copper pipes. This usually involves cleaning the pipes with a degreaser and sanding them to create a rough surface that will allow the paint to adhere properly. I would highly recommend using sandpaper with a high grit count, as this will produce a smoother surface that’s perfect for painting.
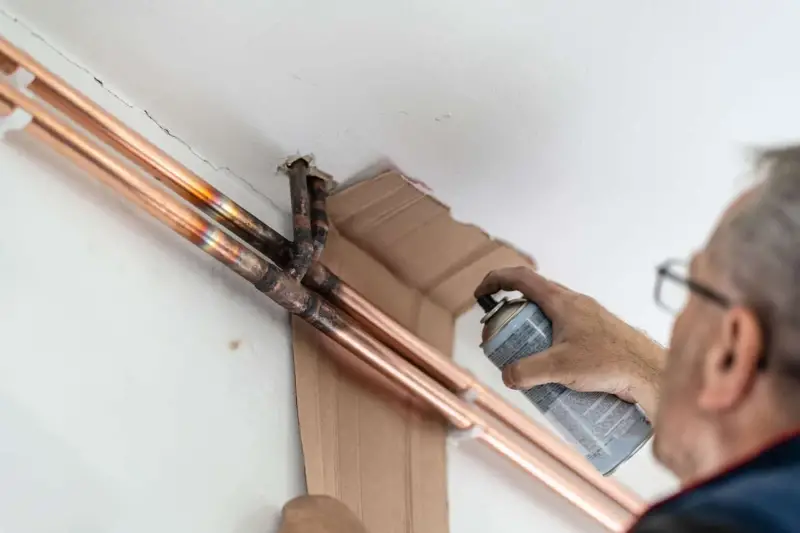
Once your pipes are cleaned and sanded, it’s time to start painting! I’ve tried several different types of paint over the years, but my favorite is definitely a specialized metal paint that’s specifically designed for use on copper pipes. This type of paint provides a durable, long-lasting finish that will protect your pipes from rust and corrosion, while also giving them a fresh, updated look.
When it comes to the actual painting process, be sure to follow the manufacturer’s instructions carefully. Usually, it’s best to start with a thin coat of paint and then build up to the desired opacity. You may need to apply multiple coats, depending on the type of paint you’re using and the color you’re trying to achieve.
Overall, painting copper pipes is a great way to give your plumbing fixtures a fresh, modern look. With the right materials and techniques, you can achieve professional results that will last for years to come!
Painting Copper Pipes – Methods in Comparison
Method 1: Sanding and Priming
The first method for painting copper pipes involves sanding the pipes to create a rough surface and then applying a primer to help the paint adhere. This method is a good choice for pipes that are in good condition and just need a fresh coat of paint.
Pros:
- The sanding process helps to remove any surface contaminants, which can improve the adhesion of the primer and paint.
- A primer provides an extra layer of protection for the pipes, helping to extend the life of the paint.
Cons:
- Sanding can be time-consuming, especially if you have a large number of pipes to paint.
- If the pipes are in poor condition, sanding alone may not be enough to prepare the surface for painting.
Method 2: Using a Metal Paint
Another option for painting copper pipes is to use a specialized metal paint. This type of paint is designed to adhere to metal surfaces and provides a durable, long-lasting finish that will protect your pipes from rust and corrosion.
Pros:
- Metal paint is specifically designed for use on metal surfaces, which makes it a great choice for painting copper pipes.
- Metal paint provides a durable finish that will protect your pipes from rust and corrosion.
Cons:
- Metal paint can be more expensive than other types of paint.
- The color selection for metal paint may be more limited than other types of paint.
Method 3: Using a Copper Paint
A third option for painting copper pipes is to use a copper paint. This type of paint is designed to mimic the look of natural copper and can help to restore the appearance of older, damaged pipes.
Pros:
- Copper paint is designed to mimic the look of natural copper, which can help to restore the appearance of older, damaged pipes.
- Copper paint provides a durable finish that will protect your pipes from rust and corrosion.
Cons:
- Copper paint can be more expensive than other types of paint.
- The color selection for copper paint may be more limited than other types of paint.
| Method | Pros | Cons |
|---|---|---|
| Sanding and Priming | – The sanding process helps to remove any surface contaminants, which can improve the adhesion of the primer and paint. <br> – A primer provides an extra layer of protection for the pipes, helping to extend the life of the paint. | – Sanding can be time-consuming, especially if you have a large number of pipes to paint. <br> – If the pipes are in poor condition, sanding alone may not be enough to prepare the surface for painting. |
| Using a Metal Paint | – Metal paint is specifically designed for use on metal surfaces, which makes it a great choice for painting copper pipes. <br> – Metal paint provides a durable finish that will protect your pipes from rust and corrosion. | – Metal paint can be more expensive than other types of paint. <br> – The color selection for metal paint may be more limited than other types of paint. |
| Using a Copper Paint | – Copper paint is designed to mimic the look of |
Equipment To Work With Painting Copper Pipes
| Equipment | Purpose |
|---|---|
| Sandpaper | To sand the surface of the pipes for better adhesion of primer and paint |
| Primer | To provide an extra layer of protection and improve adhesion of paint |
| Paintbrush | To apply primer and paint to the pipes |
| Paint roller | To apply primer and paint to the pipes (optional) |
| Paint sprayer | To apply primer and paint to the pipes (optional) |
| Masking tape | To protect adjacent surfaces from paint splatters |
| Drop cloths | To protect the floor from paint splatters |
| Paint thinner or mineral spirits | To clean up paint brushes and tools |
| Protective gloves | To protect hands from solvents and paint |
| Respirator or dust mask | To protect from inhaling dust and fumes |
It’s important to choose the right type of equipment for your specific project based on factors such as the size of the pipes, the condition of the surface, and your personal preference. A paint sprayer can be a great choice for large projects, while a paintbrush or roller may be more suitable for smaller projects or areas with tight spaces.
Step-by-Step Instruction On Painting Copper Pipes
- Clean the pipes: Clean the pipes thoroughly with soap and water, and then dry them completely. Sand the surface of the pipes to create a rough surface for the primer to adhere to.
- Apply primer: Using a paintbrush or roller, apply a coat of primer to the pipes, making sure to cover all areas completely. Allow the primer to dry completely before moving on to the next step.
- Apply paint: Using a paintbrush, roller, or sprayer, apply a coat of paint to the pipes, making sure to cover all areas completely. Allow the paint to dry completely before applying a second coat, if desired.
- Mask off adjacent surfaces: Use masking tape to protect adjacent surfaces from paint splatters. Place drop cloths on the floor to protect from paint drips.
- Clean up: Once the paint has dried completely, remove the masking tape and drop cloths. Clean your paintbrushes and tools with paint thinner or mineral spirits.
- Enjoy your newly painted pipes: Stand back and admire your newly painted pipes! With proper care and maintenance, the paint should last for several years.
Tips:
- Make sure to choose a paint that is specifically designed for use on metal surfaces and is compatible with copper.
- It’s important to allow each coat of primer and paint to dry completely before applying the next coat. This will help ensure the best results and longest-lasting finish.
- Always wear protective gloves and a respirator or dust mask while working with solvents and paint.
By following these steps, you’ll be able to paint your copper pipes with confidence and achieve a professional-looking finish.
F.A.Q.
What type of paint should I use for copper pipes?
Look for a paint that is specifically designed for use on metal surfaces and is compatible with copper. Choose a paint with good corrosion resistance and weather resistance, and that dries to a hard, durable finish.
Do I need to prime the pipes before painting?
es, it’s important to prime the pipes before painting to provide an extra layer of protection and improve adhesion of paint. Use a primer that is designed for use on metal surfaces and is compatible with the paint you will be using.
Can I use a paint sprayer to paint my copper pipes?
Yes, a paint sprayer can be a great option for painting copper pipes, especially for larger projects. However, you’ll need to choose a paint sprayer that is designed for use with metal surfaces and solvents.
How many coats of paint should I apply to my copper pipes?
It depends on the type of paint you are using and the condition of the pipes. Generally, two coats of paint will provide the best results and longest-lasting finish.
How long does it take for the paint to dry on copper pipes?
The drying time will vary depending on the type of paint and conditions, but it’s important to allow enough time for each coat of paint to dry completely before applying the next coat. Check the manufacturer’s recommendations for specific drying times.
Can I paint the inside of my copper pipes?
No, it’s not recommended to paint the inside of copper pipes as it can negatively impact the flow of water. The paint may also flake off over time and clog the pipes.
Can I paint copper pipes that are in use?
It’s not recommended to paint copper pipes that are in use as it can negatively impact the flow of water. If you need to paint your pipes, it’s best to shut off the water supply and drain the pipes before painting.


Leave a Reply