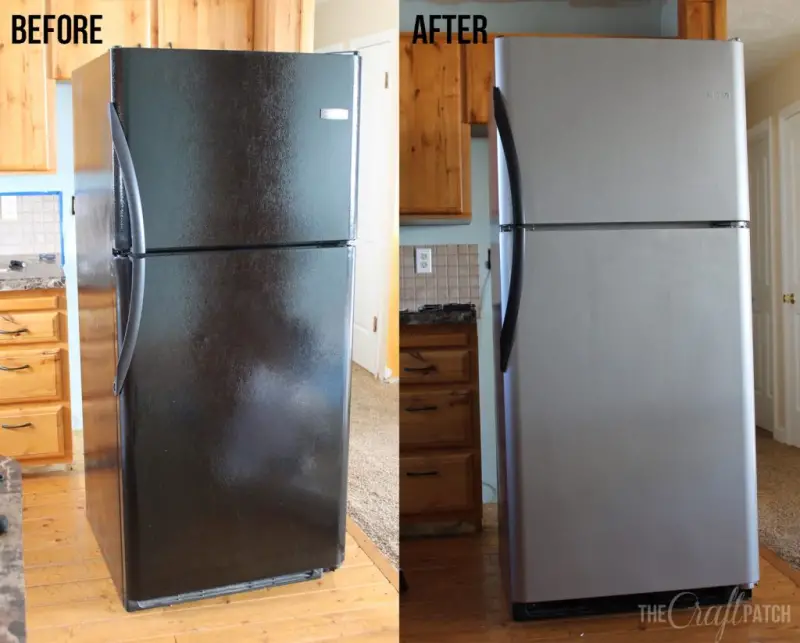
Stainless steel is a popular material for appliances, countertops, and other fixtures in modern homes due to its sleek and modern look, durability, and resistance to corrosion. However, sometimes this material can start to look a little dull or outdated. Rather than replacing entire pieces of stainless steel, painting is a quick and cost-effective solution for giving them a new lease on life.
In this blog post, we will be discussing the process of painting stainless steel and all the considerations that come along with it. We will cover topics such as preparing the surface, selecting the right paint, and tips for a successful and long-lasting finish. Whether you’re looking to give your kitchen a quick refresh, or are looking to change the overall look of your home, painting stainless steel is a great option.
Have you ever considered giving your stainless steel fixtures a makeover? Painting can not only transform their appearance but also protect them from the elements. Keep reading to find out how you can achieve a professional-looking finish in just a few simple steps.
Painting Stainless Steel Overview
Painting stainless steel can be a really exciting project that can completely transform the look of your appliances, countertops, and fixtures! It’s a great way to breathe new life into something that might be looking a little dull or outdated, without having to replace the entire piece. Plus, painting stainless steel can also offer protection from the elements and extend its lifespan.
There are a few key steps involved in painting stainless steel, starting with preparing the surface. This means thoroughly cleaning it, removing any grease or oil, and ensuring that it’s completely dry. Then, you’ll want to choose the right paint for the job. Many people choose to use a specialized paint designed for use on metal surfaces, as it offers excellent adhesion and durability. Be sure to carefully follow the manufacturer’s instructions and give the paint enough time to dry fully.
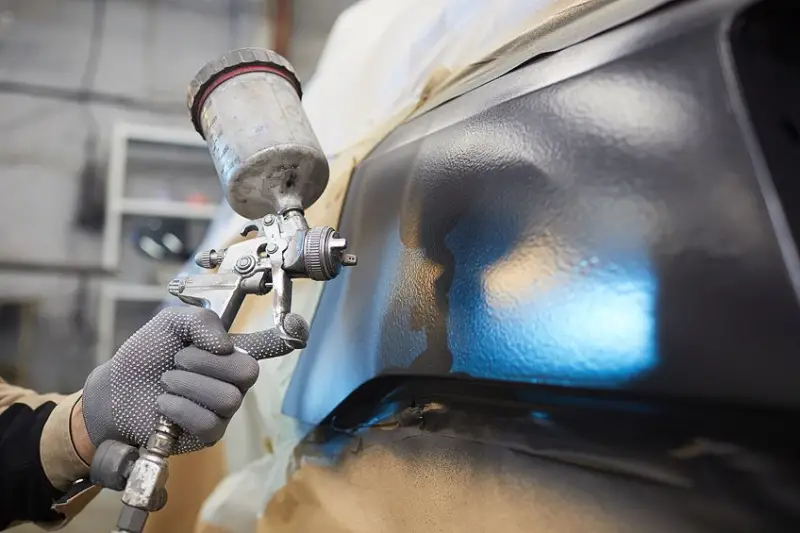
Once you’ve chosen your paint, the next step is to actually paint the stainless steel. This can be done with a brush or roller, depending on the size of the surface you’re working on. You’ll want to make sure that you apply the paint evenly, and be careful not to leave any drips or runs. A couple of coats will usually be enough, but it’s best to wait until the first coat has fully dried before applying the second.
Finally, you’ll want to protect your newly-painted stainless steel with a clear topcoat. This will not only help to seal in the color, but also add an extra layer of protection against scratches and other damage. Overall, painting stainless steel can be a great way to give your home a fresh, modern look. With a little patience and attention to detail, you’ll be amazed at the results you can achieve!
Painting Stainless Steel -Methods in Comparison
Method 1: Using a Stainless Steel Paint
Stainless steel paint is a specialized product that’s specifically designed for use on this type of metal. It offers excellent adhesion and durability, and is usually available in a range of colors to suit your needs. To use this method, start by thoroughly cleaning and degreasing the surface, and then apply the paint using a brush or roller. This method is best for smaller surfaces, such as sinks, faucets, and small appliances.
Pros:
- Easy to apply
- Offers good adhesion and durability
- Available in a range of colors
Cons:
- Can be more expensive than other options
- May not be suitable for larger surfaces, such as countertops or cabinets
Method 2: Using a Primer and Enamel Paint
This method involves applying a metal primer to the surface of the stainless steel, followed by a topcoat of enamel paint. The primer helps the paint to adhere better to the metal surface, and the enamel paint offers a durable and long-lasting finish. To use this method, start by cleaning and degreasing the surface, then apply the primer according to the manufacturer’s instructions. Wait for it to dry, and then apply the enamel paint.
Pros:
- Offers a durable and long-lasting finish
- Can be used on larger surfaces, such as countertops or cabinets
- Suitable for use with a range of different enamel paints
Cons:
- Can be more time-consuming than other options
- May require multiple coats for a good finish
Method 3: Using a Vinyl Wrap
A vinyl wrap is a type of film that can be applied to the surface of the stainless steel to change its color and finish. This method is quick and easy, and is suitable for use on larger surfaces such as countertops, cabinets, and even entire appliances. To use this method, simply clean and degrease the surface, and then apply the vinyl wrap according to the manufacturer’s instructions.
Pros:
- Quick and easy to apply
- Suitable for use on larger surfaces
- No need for additional tools or products
Cons:
- Can be less durable than other options
- May not be suitable for use in high-heat or high-moisture areas
In conclusion, the method you choose for painting stainless steel will depend on your specific needs and preferences. Stainless steel paint is a good option for smaller surfaces, while a primer and enamel paint can be used on larger surfaces for a durable finish. A vinyl wrap is a quick and easy option, but may not be as durable as the other methods. Whichever method you choose, be sure to follow the manufacturer’s instructions carefully and take the time to thoroughly prepare the surface for the best results.
Equipment To Work With Painting Stainless Steel
| Equipment | Purpose |
|---|---|
| Cleaning solution | To clean and degrease the surface of the stainless steel before painting |
| Scouring pad or steel wool | To remove any rust or surface imperfections |
| Sandpaper | To rough up the surface of the stainless steel for better adhesion |
| Primer | To provide a base for the paint to adhere to, if using the primer and enamel paint method |
| Paintbrush or roller | To apply the primer and/or paint to the surface |
| Stainless steel paint or enamel paint | To change the color and finish of the stainless steel |
| Vinyl wrap | To cover the surface of the stainless steel with a new finish, if using the vinyl wrap method |
| Razor blade or cutting tool | To trim the vinyl wrap to fit the surface of the stainless steel |
| Heat gun or hair dryer | To help the vinyl wrap conform to the surface of the stainless steel |
Please note that the specific equipment you’ll need will depend on the method you choose for painting your stainless steel. Be sure to carefully read the manufacturer’s instructions for the products you’re using to ensure that you have everything you need to get the job done right.
Step-by-Step Instruction On Painting Stainless Steel
- Clean the surface: Start by thoroughly cleaning the surface of the stainless steel with a cleaning solution. This will help to remove any dirt, grime, or oils that may be on the surface, ensuring that the paint will adhere properly.
- Remove any rust or surface imperfections: Use a scouring pad or steel wool to remove any rust or surface imperfections from the stainless steel. This will help to ensure that the paint will have a smooth, even surface to adhere to.
- Sand the surface: Lightly sand the surface of the stainless steel with sandpaper to rough it up a bit. This will help the paint to adhere better to the surface.
- Apply primer: If using the primer and enamel paint method, apply a thin, even layer of primer to the surface of the stainless steel. Be sure to let the primer dry completely before moving on to the next step.
- Apply paint: Using a paintbrush or roller, apply a thin, even layer of stainless steel paint or enamel paint to the surface of the stainless steel. Let the paint dry completely before applying a second coat if necessary.
- Install vinyl wrap: If using the vinyl wrap method, carefully measure and cut the vinyl wrap to fit the surface of the stainless steel. Then, using a heat gun or hair dryer, heat the vinyl wrap so that it conforms to the surface of the stainless steel. Trim any excess vinyl wrap with a razor blade or cutting tool.
- Enjoy your new look: Once the paint or vinyl wrap is dry and set, you can enjoy your newly painted stainless steel! Be sure to handle it carefully and avoid exposing it to harsh chemicals or abrasive surfaces to keep it looking its best.
By following these simple steps, you can successfully paint your stainless steel and achieve the look and finish that you’re after. Good luck!
F.A.Q.
What type of paint should I use on stainless steel?
Stainless steel paint or enamel paint specifically designed for use on metal surfaces is recommended for painting stainless steel.
Can I paint over existing paint on stainless steel?
Yes, you can paint over existing paint on stainless steel. However, it is important to thoroughly clean and degrease the surface before applying new paint to ensure proper adhesion.
Do I need to use a primer when painting stainless steel?
A primer is recommended when painting stainless steel to provide a base for the paint to adhere to. It also helps to protect the metal from rust and corrosion.
How many coats of paint should I apply to stainless steel?
The number of coats of paint you’ll need to apply to stainless steel will depend on the type of paint you’re using and the look you’re trying to achieve. A minimum of two coats is typically recommended for a smooth, even finish.
Can I use regular spray paint on stainless steel?
Yes, you can use regular spray paint on stainless steel. However, it’s important to use a paint specifically designed for metal surfaces for the best results.
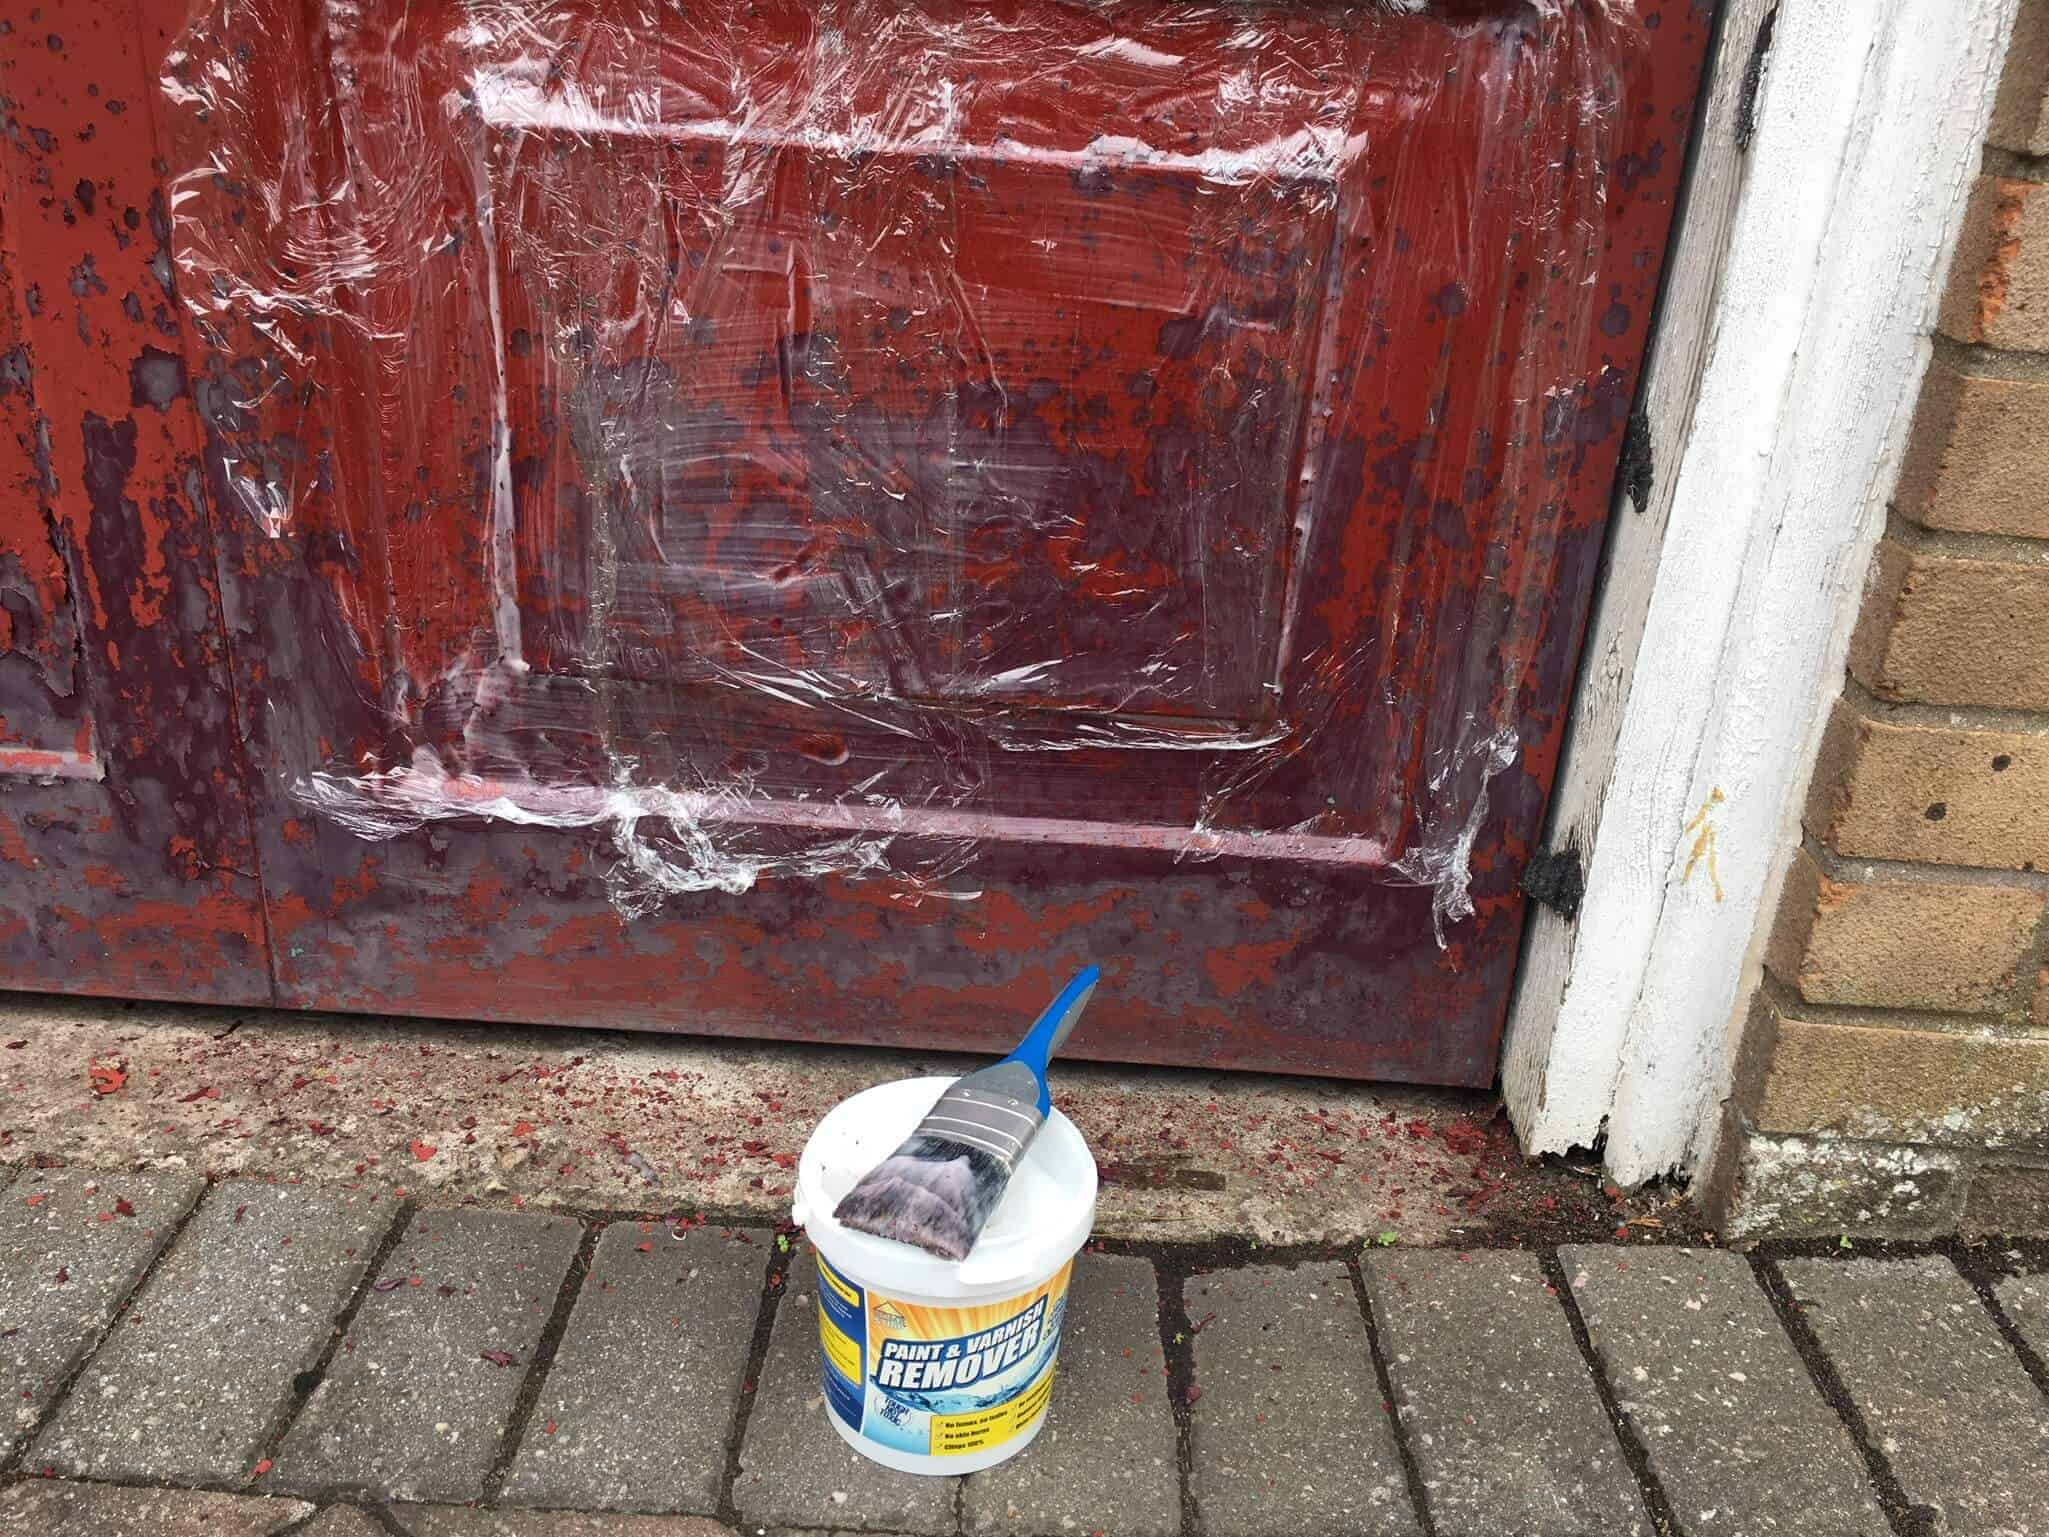
How do I remove paint from stainless steel?
To remove paint from stainless steel, you can use a paint stripper or sand the surface with sandpaper. You can also try using a heat gun or hair dryer to soften the paint and scrape it off with a scraper or putty knife.
Can I paint stainless steel with a brush or roller?
Yes, you can paint stainless steel with a brush or roller. A paintbrush is often preferred for smaller, more intricate surfaces, while a roller is best for larger, flatter surfaces.
How long does it take for paint to dry on stainless steel?
The drying time for paint on stainless steel will depend on the type of paint you’re using and the temperature and humidity conditions. It’s important to follow the manufacturer’s instructions for drying times, which can range from a few hours to several days.
Leave a Reply