Rust-Oleum is a well-known brand in the world of paint and coating products. Its products are popular for their durability and versatility, making them a go-to choice for homeowners, DIY enthusiasts, and professional contractors alike. If you’re looking to refresh the look of your wooden furniture or other wooden surfaces, Rust-Oleum is definitely a product to consider.
In this blog post, we’ll be diving deep into Rust-Oleum for wood. We’ll explore the different types of Rust-Oleum products available for wood, as well as their benefits, drawbacks, and application tips. Whether you’re looking to paint your kitchen cabinets, revamp your old wooden furniture, or protect your outdoor wooden deck from the elements, we’ve got you covered. We’ll also provide helpful advice and insights on how to choose the right Rust-Oleum product for your project, and how to get the best results.
Rust Oleum On Wood
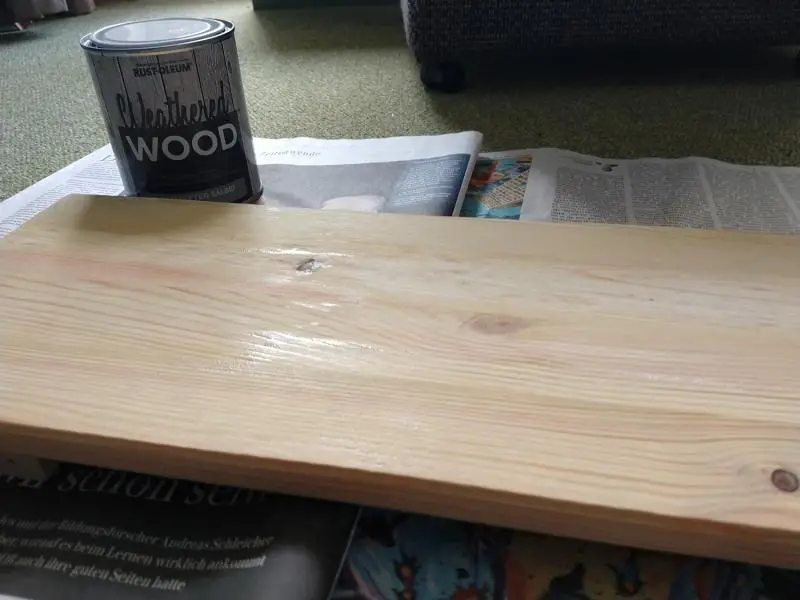
Rust-Oleum is a top-notch brand that produces high-quality, durable paint and coatings. They have a range of products specifically designed for wood surfaces, including furniture, cabinets, decks, and more. And let me tell you, the results are stunning! The paint goes on smoothly and evenly, and dries to a hard, long-lasting finish. Plus, the colors are just beautiful and vibrant.
One of the great things about Rust-Oleum for wood is that it’s incredibly versatile. You can choose from a variety of finishes, including gloss, semi-gloss, and satin, to achieve the look you’re going for. And, if you’re looking for something a little extra special, Rust-Oleum also has specialty products, like chalk paint and metallic finishes, that will give your wood an amazing, one-of-a-kind look.
As far as the application process goes, it’s really not too difficult. With the right tools and some basic knowledge of painting techniques, you can achieve professional-looking results. And, if you’re not feeling confident in your painting skills, Rust-Oleum also has easy-to-use spray paints that make the process a breeze.
The most common Issues that Arise when Using Rust-Oleum on Wood
Peeling or Chipping: One of the most common problems when using Rust-Oleum on wood is peeling or chipping of the paint. This can occur due to a variety of factors, including poor surface preparation, a lack of primer, or improper application.
Uneven Coverage: Another common problem is uneven coverage, which can result in streaks, blotches, or an overall uneven appearance. This can be caused by a variety of factors, including the use of the wrong brush, improper sanding, or not using enough coats.
Yellowing: Over time, the paint on wooden surfaces can start to yellow, which can detract from the overall appearance of the wood. This can be caused by a variety of factors, including exposure to sunlight, high humidity, or the use of the wrong type of paint.
Methods for Solving Rust-Oleum on Wood Issues
- Sanding: Sanding is a common method for solving the issue of peeling or chipping paint. By sanding the surface of the wood, you can remove any rough or uneven areas and create a smooth surface for the new coat of paint.
- Priming: Priming is an essential step in the painting process and can help to prevent issues with uneven coverage. By using a primer specifically designed for wood, you can ensure that the paint adheres properly and dries evenly.
- UV-Resistant Paint: To prevent yellowing, it’s important to use a paint that is specifically designed to be UV-resistant. This type of paint will help to protect the wood from the damaging effects of sunlight and other environmental factors.
Methods Pros Cons
Sanding – Effective for solving peeling or chipping paint – Can be used to create a smooth surface for new paint – Can be time-consuming – Requires specialized tools
Priming – Essential for preventing uneven coverage – Improves the durability of the paint – Can be messy and time-consuming – Adds an extra step to the painting process
UV-Resistant Paint – Protects wood from yellowing – Can improve the overall appearance of the wood – Can be more expensive than traditional paint – May not be available in a wide range of colors
The methods for solving Rust-Oleum on wood issues each have their own pros and cons. Sanding is an effective solution for peeling or chipping paint, but can be time-consuming and requires specialized tools. Priming is essential for preventing uneven coverage, but can be messy and time-consuming. UV-resistant paint can help prevent yellowing, but can be more expensive and may not be available in a wide range of colors. Ultimately, the best method for solving Rust-Oleum on wood issues will depend on your specific needs and circumstances.
Equipment List for Working with Rust-Oleum on Wood
- Sandpaper or Sander: Sanding the wood surface prior to painting is an important step in the process. Sandpaper or a sander can be used to remove rough or uneven areas and create a smooth surface for the paint to adhere to.
- Primer: Primer is an essential step in the painting process, as it helps the paint adhere properly and dries evenly. It is important to use a primer specifically designed for wood.
- Paint Brush or Roller: A paint brush or roller is used to apply the paint to the wood surface. It’s important to choose the right brush or roller based on the type of paint being used and the desired effect.
- Paint: Rust-Oleum offers a wide range of paints and coatings that can be used on wood, including oil-based, water-based, and spray paints. It’s important to choose the right type of paint based on the desired finish and the specific needs of the project.
- Drop Cloth or Plastic Sheeting: A drop cloth or plastic sheeting is used to protect the surrounding area from drips and spills.
- Gloves: Gloves should be worn to protect your hands from the chemicals in the paint and primer.
- Safety Glasses: Safety glasses should be worn to protect your eyes from dust and debris during sanding, as well as from any potential splatters while painting.
- Stir Stick: A stir stick is used to mix the paint or primer before application.
- Masking Tape: Masking tape can be used to protect areas of the wood that you don’t want painted, such as trim or hardware.
This equipment list provides the basic tools necessary for working with Rust-Oleum on wood. Depending on the specific needs of the project, you may need additional equipment such as a ladder or a sprayer. It’s important to carefully read the instructions on the Rust-Oleum product you’re using to ensure that you have all of the necessary equipment and materials.
Step-by-Step Guide
- Prepare the Surface: Sand the wood surface to remove any rough or uneven areas and create a smooth surface for the paint to adhere to. Use a fine-grit sandpaper or sanding machine, taking care to sand in the direction of the grain. Wipe down the surface with a damp cloth to remove any dust or debris.
- Apply Primer: Apply a coat of primer specifically designed for wood. This will help the paint adhere properly and dry evenly. Use a paint brush or roller, making sure to cover the entire surface evenly. Allow the primer to dry completely, following the manufacturer’s instructions.
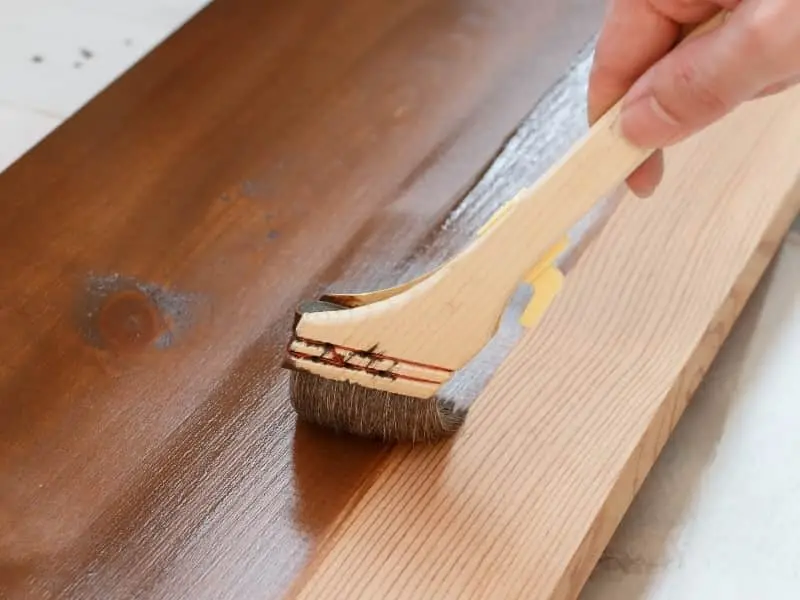
- Paint: Once the primer has dried, it’s time to apply the Rust-Oleum paint. Stir the paint thoroughly to ensure an even color and consistency. Use a paint brush or roller, making sure to cover the entire surface evenly. Work in small sections and be careful not to overload the brush or roller, which can cause drips and an uneven finish.
- Dry Time: Allow the paint to dry completely, following the manufacturer’s instructions. Depending on the type of paint and the humidity and temperature, this can take anywhere from a few hours to several days.
- Apply Additional Coats: Depending on the desired finish, you may want to apply additional coats of paint. Allow each coat to dry completely before applying the next one.
- Clean Up: Once the paint has dried completely, remove any masking tape and dispose of the drop cloth or plastic sheeting. Clean your brush or roller with soap and water, and store the paint in a cool, dry place.
This step-by-step guide provides a clear and easy-to-follow process for applying Rust-Oleum on wood. It’s important to follow the instructions carefully and take your time, as the results will be worth it. Remember to wear gloves and safety glasses to protect your hands and eyes, and to work in a well-ventilated area.
FAQ
What type of wood can I use Rust-Oleum on?
Rust-Oleum can be used on a variety of different types of wood, including pine, oak, cedar, and more. It’s important to carefully read the instructions on the Rust-Oleum product you’re using to ensure that it’s suitable for the specific type of wood you’re working with.
Do I need to use a primer with Rust-Oleum paint?
Yes, it’s recommended to use a primer specifically designed for wood before applying Rust-Oleum paint. This will help the paint adhere properly and dry evenly.
What type of paint brush or roller should I use with Rust-Oleum?
The type of paint brush or roller you use will depend on the type of paint and the desired finish. It’s important to carefully read the instructions on the Rust-Oleum product you’re using to determine the recommended tools.
Can I use Rust-Oleum on outdoor wood?
Yes, Rust-Oleum offers a wide range of paints and coatings that are specifically designed for outdoor use on wood. These products are formulated to withstand the elements and provide long-lasting protection.
Can I use Rust-Oleum on pressure-treated wood?
Yes, Rust-Oleum can be used on pressure-treated wood. However, it’s important to carefully read the instructions on the Rust-Oleum product you’re using to ensure that it’s suitable for use on pressure-treated wood.
How many coats of Rust-Oleum do I need to apply?
The number of coats required will depend on the type of paint and the desired finish. It’s important to carefully read the instructions on the Rust-Oleum product you’re using to determine the recommended number of coats.

Leave a Reply